
The fireplace makeover is complete and we did it all within our tight deadline (less than one week to be exact!). With time ticking and multiple projects on the go, we are happy to move forward with the rest of our family room design.
This before and after transformation is huge and personally I don’t think these pictures do it justice. From the glistening marble tile to the sparkling glass pieces in the fireplace, to the pillars on the mantel—the end result just feels so luxe.


Coming up with a plan to update this corner fireplace was quite the challenge. There were two things we had to consider and work into the design, 1) the giant mirror; and 2) the crown molding already installed on the ceiling.
Here’s what we did.
To fix the crown molding situation, we created a mini soffit. It hides the electrical wires from our pot lights and also creates a nice transition from the crown molding to the soffit.
In order to secure this MDF box to the ceiling, Mike and Big Joe used brackets, which they hid from the inside. Another piece of MDF was nailed to the bottom to complete the look.

Since our new Napoleon Ascent 36 fireplace is installed and working properly, we could patch up the surround. It’s always important to refer to your fireplace’s manual to make sure you’re meeting the minimum clearance for combustible and non-combustible materials.

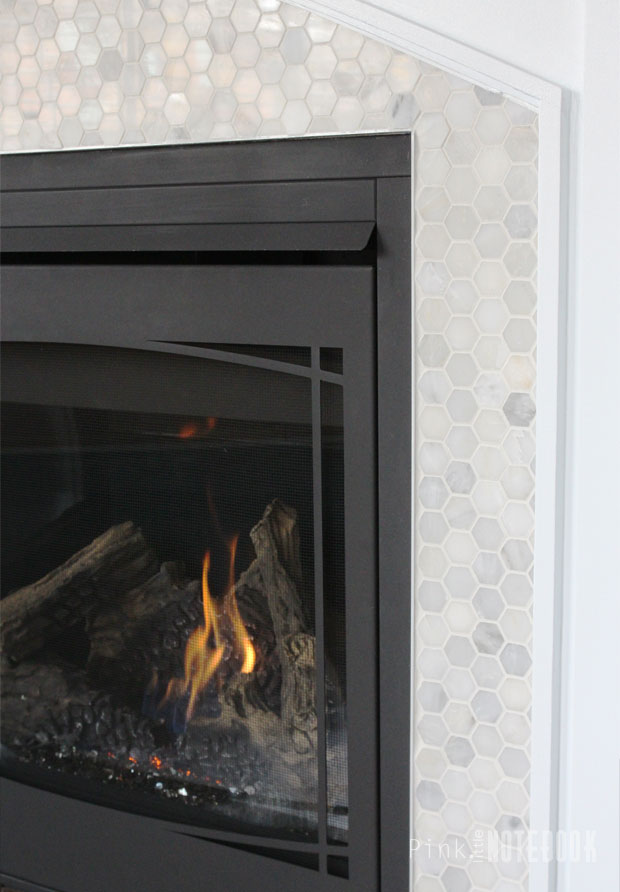
Before the mantel can be put back in place, tile needs to be installed. I picked out a classic marble hex tile.


We made life easier by using pre-mixed adhesive and grout for this small job.

Once everything dried, the mantel was nailed back up and we began working on the mirror.
Using the same MDF, we had panels cut-to-size that we used to create the frame. The two side panels are 8″ wide while the top and bottom panels are smaller at 3″ wide.
To glue the panels, we used PL Premium. If you haven’t figured out by now, this is our go-to adhesive for pretty much every project we do. It’s so versatile and works well on a mirrored surface. Use painters tape to keep in place so it won’t shift while drying.

To add some visual interest, we decided to try something a little different. We added pillars on either side of the mirror using 3″ plastic pipe.


Mike and Big Joe came up with these very clever decorative bases so that we can easily secure the pipe to the mantel using glue and nails.

For a sleek and more contemporary look, I patched up the existing grooves on the legs of the mantel. I also made sure all seams and nail marks were filled with putty before we began painting.

To give the mirror a finished look, we also added cove molding around the perimeter of the mirror. For extra detail, we glued a small decorative trim over the seam where the cove molding meets the MDF. As I constantly remind my husband, it’s the little details that make all the difference!

Once the final coat of paint was complete, we attached our homemade pillars using glue and a few nails.

We couldn’t be more pleased with the finished product!

Big thank you to Napoleon Fireplaces for partnering up with us and Big Joe for the extra set of hands 🙂
To follow the fireplace adventure from the beginning, check out:
Part 1: The Death Trap
Part 2: We’ve got a New Fireplace! Napoleon Ascent 36
Before & After: Family Room Reveal

Be sure to watch our video showcasing the transformation from start to finish!


23 Comments
What an incredible job! I love the way it turned out! I keep telling my husband that I would love a fireplace but we have nowhere to put one 🙁
The final results couldn’t be more attractive! You took an difficult fireplace and created a beautiful feature for your room. Great work.
Thanks Shirey! We are super excited not only to have a functional fireplace for the winter but one that is quite the looker! Thanks for stopping by 🙂
The fireplace looks great! I’ve been in the middle of repurposing a lot of furniture around my house the past couple of months and I’ve got the DIY bug now haha. Now, I want to re-do everything in my house!
That’s how it all starts Channing!! You begin small and next thing you know you’re ripping out your bathroom lol. It’s the most rewarding feeling to sit back in your home and look at projects you completed on your own. Way to go!!
LOVING this fireplace!! Great job 🙂
What an incredible makeover. Your new fireplace looks beautiful and it’s just in time for Christmas. Great job with the video and your red bootie slippers are super cute! 🙂
Once the colder weather hits, the slipper collection comes out. . .haha. Thanks so much Amy! This is the first time we have a mantel so I’m excited to decorate for the holidays 🙂
It came out so nice!!! I like all the little details put into it and I like the white color! I always try going for a more modern white look in my apartment!
What a transformation! It looks great!
The frame around the mirror is such a huge improvement and ties it all in with the rest of the fireplace so well. Such a wonderful transformation. Well done.
This looks so amazing. I’m super impressed that you were able to transform such a dated corner (ugh) fireplace into a beautiful feature that anyone would be pleased to have. The pillars are super smart. Very well done!
It looks SO good!!! What a great update! <3
What a wonderful transformation. Genius using that pipe too.
Cute video. Can’t wait to see the finished space.
Keep up the great work!
Thanks so much Victoria!! The pipe idea worked out better than we thought and it’s a great alternative to buying super expensive pillars 🙂
Dang girl! this looks great!…very expensive!
The finished product looks AMAZING!!!
LiveLifeWell,
Allison
Oh Sabrina it’s beautiful!! I absolutely love all of the details – – the marble, trim, and those pillars! That was brilliant. You guys did a great job…and so quickly!
We took a lot on in a short period of time but somehow managed it, thankfully! Not easy being pregnant and all (as I’m sure you know very well!) Thanks so much for stopping by 🙂
Beautiful
WOW … Although just painting the thing white would have been an improvement, this went way beyond that.
I especially like the columns on the mantel. It makes the mirror look less like a 1960s bathroom and gives the little soffit a reason for being there.
This is wonderful. We have exactly the same problem, but with a big issue thrown in — a vaulted ceiling. But your project gives me hope. Thanks for sharing.
Wow, what an incredible makeover! I am impressed with the transformation of a fireplace into a beautiful feature. Keep up the great work!