
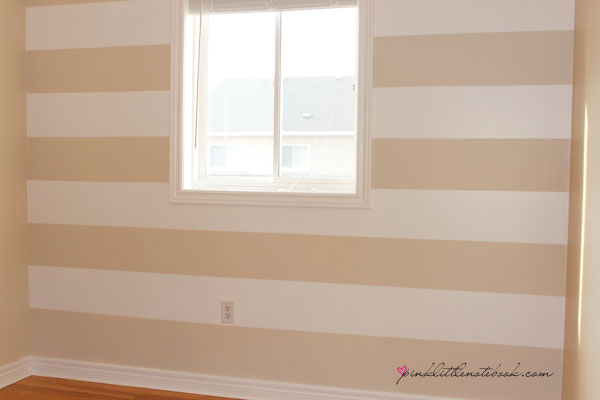
I finally got my stripes! It took us roughly two hours to do and I’m so excited with the results!
This stripe wall is pretty darn simple to do but a keen eye is needed to make sure that all your stripes are leveled and accurate. Nothing is worse than stripes gone wonky.

For this project, I used left over paint we had (Benjamin Moore, Colour: Simply White, Semi-gloss) and painter’s tape. As I mentioned in my last post, the walls were painted fairly recent and I have decided to leave the neutral taupe colour.
To get started, this is what I did:
Step #1: Decide on the direction of your stripes. Horizontal stripes make a room appear more spacious; vertical stripes make the ceiling appear higher.
Step #2: Paint your walls. In my situation, they were already painted a solid colour but if you do paint, please make sure your wall fully dries before you attempt to put tape on it.

Step #3: Measure and calculate. There are a number of ways to calculate the dimensions of your stripes. You can either take your ceiling height and divide it by the number of stripes you want (ex: 96″ ceiling / 5 stripes = 19.2″ wide stripes) or you can take the ceiling height and divide it by the number of inches you want the stripes to be (ex: 96″ ceiling / 15″ wide stripes = 6.4 stripes). In this case, you would end up with almost half a stripe at either the top or bottom of your wall.
This was news to me before I owned a home so an FYI for those who don’t know, 90% of the time your wall will be off. For instance, our ceiling dips down a few inches on one side. We had to compensate for that in our measurements so you wouldn’t notice our crooked wall in our straight lines. Be prepared to make adjustments in your measurements to offset any wall defects.

Step #4: Take out your pencil and painter’s tape. This is probably the most time consuming step ( if you have a laser level, you’re ahead of the game).
-Start measuring the stripes out and use a pencil to make the marks on the wall (make sure to erase after).
-Use the painter’s tape to make the straight lines across the wall. Stand back after each line to make sure it is straight. Reposition if needed. If not, press that painter’s tape down really well (nothing makes my heart sink more than peeling away the tape and finding the paint went through).
Side Note: Make sure to put the tape on the correct side of the pencil mark, it’s very easy to get confused in the beginning (and by doing this from the start, it will ensure that you will avoid any confrontations with your “helper” after the tape is up).
Step #5: Paint. Get a roller (or brush, if you have a smaller stripes) and apply a coat of paint. I always recommend at least two coats.


Step #6: You’re finished! Gently remove the painter’s tape just before it dries. If you have any bleeding or errors, this would be the time to fix it.

Happy painting!


3 Comments
Great idea and great job!
What was the original paint color? And the room looks great!
Hi Gwen! the original paint is PARA Paints, Orchid P5224-24. Thanks for stopping by 🙂