Pink Little Notebook
  • Home
  • About
  • Projects
  • Room Bf+Af
  • Contact
  • SHOP
Before + After Makeovers, DIY, Laundry Room, Project Gallery, The Mod House Project 18

The Easiest Way to Update a Flat Panel Door

By Sabrina @pinklilnotebook · On November 29, 2018

Doors play a more important role in decor than you might think. Just as updating your front entry door can make a substantial impact on your home’s curb appeal, updating your interior doors can make you feel like you’ve done a remodel.

To get the look of costly paneled doors (without the expense), a little moulding, paint and new hardware can go a long way.

Add style and detail to any of your doors with this quick and easy DIY project.

Materials

Moulding/Trim
Primer
Melamine+Cabinet Paint
Paint Brush/Roller
Nail Gun
Wood Putty
Hand Sander
Door Hardware

Instructions

1.   You want to choose a molding that accents but doesn’t overwhelm your interior doors.  Measure and calculate the size of the frames that you need to make.

2.  Cut your moulding pieces down to size for each door with a mitre saw and lay out your trim on the doors.  Before you secure it in place, measure for even placement.

*TIP* Use a nail gun to secure the moulding instead of wood glue. You eliminate any wait time. 

3.  Fill in the nail holes and any cracks in the corner with wood putty.  Sand it all down once it dries.

4.  There is no easier or more impactful way to update your doors than painting them.  To begin, use a primer to prep—a good

no prescription needed pharmacy, Compare Drugstore Prices generic viagra does it work http://ridgefieldacupuncture.com/cheap-viagra/ medicine no prescription, viagra real online paypal canadian pharmacy online

primer is key to a great paint job. I used Para Paints Colour Boost Primer.

*TIP* To paint both sides of the doors simultaneously, it’s better to have the doors on the hinges vs laying flat.  It cuts dry time in half.

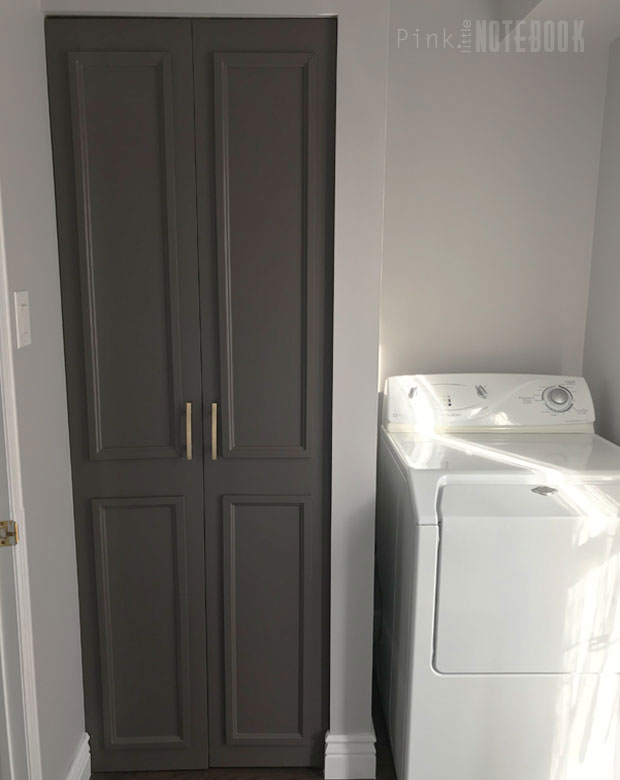
5.  To get the ultimate surface protection and durability, it’s important to use paint specifically made for your surface. My go-to paint for furniture and doors is Para Paints Melamine, Cabinet and Furniture Paint (shown here in the colour Brushed Nickel, P5244-62). I apply my last two thin layers of paint with a high-density paint roller.

Paint alone always makes the biggest difference but add a little moulding and new hardware and you got yourself a brand new door.  It’s such a quick and easy way to dress up those old doors.

Disclosure: This post was brought to you by My Colour Journey With Para Paints.  As always, all thoughts and opinions are my own. #mycolourjourneywithPARApaints

DIYDIY panel interior doorsEasiest way to update your dated doorsflat panel door DIYMy Colour Journey with Para PaintsPara Paint Brushed Nickelpink little notebook
Share Tweet

Sabrina

Sabrina is the design enthusiast behind the blog, Pink Little Notebook, where she explores her creativity through home décor, thrift store finds, DIY projects and her ever growing love to paint everything in sight! She is indeed a storyteller of style and has an extensive mixture of artistic skills and abilities which include everything from make-up art, graphic designing, painting, drawing, and even self-taught photography, just to name a few. Through her blog Sabrina combines everything she has learned over the years and hopes to inspire others along the way!

You Might Also Like

  • Before + After Makeovers

    Final Reveal: My Ice Cream Shop

  • DIY

    Finishing Details

  • DIY

    DIY Laminate Countertops

18 Comments

  • Morgan says: November 29, 2018 at 11:14 am

    This is awesome! Can’t wait to try. Thanks for sharing 🙂

    Reply
  • Marette says: November 29, 2018 at 1:38 pm

    That really elevates the look of the space! I like the paint color you used.

    Reply
  • Ashley says: November 29, 2018 at 4:19 pm

    Wow, what a transformation! I love how updated these look!

    Reply
    • Sabrina says: December 3, 2018 at 9:53 am

      Thank you! I’m happy with the results. These doors look like they are brand new!

      Reply
  • Samantha says: November 30, 2018 at 8:06 am

    So crazy what a little paint can do! This look amazing

    Reply
    • Sabrina says: December 3, 2018 at 9:50 am

      Right! Paint is magic!

      Reply
  • adriana says: November 30, 2018 at 11:35 am

    WOW! This looks amazing! You did such a good job – what a difference!

    Reply
    • Sabrina says: December 3, 2018 at 9:51 am

      Thanks Adriana! It’s definitely a huge improvement for little $

      Reply
  • Christa says: November 30, 2018 at 1:25 pm

    Oh wow, that makes such a huge difference! I love projects that can be completed ina weekend and completely elevate the look of a space.

    Reply
    • Sabrina says: December 3, 2018 at 9:54 am

      Me too! Weekend projects are the best. It’s instant gratification!

      Reply
  • Aarika says: November 30, 2018 at 2:21 pm

    This is a really awesome idea, and the transformation is fantastic. I love this easy DIY idea. Thanks!

    Reply
  • Home Arise says: December 8, 2018 at 11:07 pm

    Thank you very much for post the article. Really, it’s very good. I learnt a lot about this. I’ll try to apply your ideas and tips.

    Reply
  • The Modest Mansion says: December 20, 2018 at 5:23 pm

    Love the quick and easy project, Sabrina! Did you have any issues re-hanging the doors on those %=÷$@#$÷! concealed hinges??

    Reply
  • Sabrina says: December 28, 2018 at 12:30 pm

    They were a bit finicky. We had to adjust them several times to line up the doors but eventually we got it.

    Reply
  • Autem Decker says: January 17, 2019 at 1:57 am

    Love your renovation idea and make sense 😉 for the door. They look beautiful and very attractive. And definitely, all those credits go to you, Sabrina. You have a really good sense of design.

    Reply
    • Sabrina says: January 24, 2019 at 8:56 pm

      Thank you so much, you’ve made my day!!

      Reply
  • Russells says: March 13, 2019 at 2:37 am

    This look amazing… Great work….

    Reply
  • Kathleen Watson says: January 29, 2021 at 9:37 pm

    Sabrina, Could you please email me your walk-in close design and steps. It looks amazing and I’d like to try doing the same. I love that it’s completely framed and has finishing trim to finish the project in a classy way. I love the gold Richelue Hardware

    Reply
  • Leave a reply Cancel reply

    Hi I'm Sabrina
    Follow @pinklilnotebook
    Follow on Instagram
    Follow pinklilnotebook

    Subscribe by Email


    • Popular
    • Comments
    • Tags
    • Yes! You Really Can Paint Tiles: Rust-Oleum Tile Transformations Kit

      May 16, 2014
    • How to Freshen up your Grout Lines (for $2 or less)

      June 30, 2016
    • Thinking about the BLANCO SILGRANIT Sink?

      March 5, 2015
    • Part 3: Home Office Reveal

      May 10, 2013
    • REVEAL ORC Week 6: Combined Living + Dining Makeover

      May 7, 2015
    pink little notebook DIY The Mod House Project Para Paints One Room Challenge Para Blog Crew 2014 bathroom bathroom makeover washroom IKEA kitchen before and after Pink Litte Notebook bathroom reno house remodeling IKEA hack baby girl nursery Wayfair Canada tile

    Find us on Facebook

    Projects by Room

    Basement

    Bathroom

    Bedroom

    Entry

    Exterior

    Garage

    Home Office

    Kitchen

    Laundry Room

    Living + Dining Room

    Nursery

    Staircase

    • About
    • Before + Afters
    • SHOP
    • Press
    • Contact

    © 2019 PinkLittleNotebook.com. All rights reserved. PinkLittleNotebook.com participates in select affiliate advertising programs. This means that if you click and/or make a purchase through certain links on this site or any related social media platforms, PinkLittleNotebook.com may make a commission from that click and/or purchase. All opinions are my own, and all brands featured represent what I personally like and support.